I genuinely admire moms who are naturally crafty.
If, like me, DIY isn’t exactly at the top of your skill set — but you love holidays and creating that cozy, festive feeling with your kids — this is for you.
These glowing potion jars are the perfect kind of project: doable, pretty, and low-stress. No complicated supplies, no glue panic, no pressure to be Pinterest-perfect.
Just simple Halloween crafts that work — even if you’ve never made anything with Mod Podge in your life.
You’ll find five easy jar ideas below, all with clear steps and minimal mess. Perfect for a slow afternoon, party decor, or a little extra glow in your Halloween photo booth.
Let’s make something fun — and yes, even kind of magical.
Table of Contents
Fairy Glow Jar – A Simple Halloween Craft with Soft Light
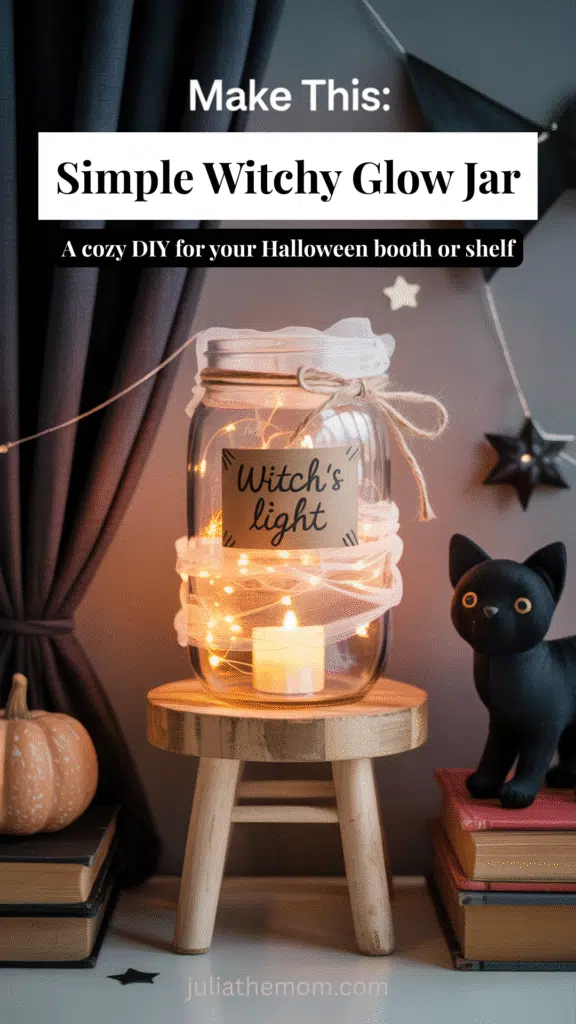
This is one of the easiest Simple Halloween Crafts you can make at home — no liquids, no glue, no clean-up.
It’s a quick way to add a soft, magical glow to your Halloween photo booth, even if you’re not usually into crafts. Simple Halloween Crafts like this one are perfect for cozy afternoons with your tween.
Let me know if you want a shorter version or CTA-style ending!
It works especially well for:
- Small spaces or indoor setups
- Younger tweens who like simple, cozy decor
- Last-minute booth prep when you want something cute but fast
Materials You’ll Need
- A clear glass jar (mason jar, baby food jar, or any small jar you have)
- 1 battery-operated LED tealight or a short string of battery-powered fairy lights
- A small piece of tulle, sheer fabric, or netting (optional)
- A label or tag (optional)
Safety note: Always use LED lights — never open flame. These battery-powered lights stay cool and are safe around kids and fabric.
How to Make It
Step 1: Prep your jar
Make sure your jar is clean and dry. Remove any old labels or residue so the glow can shine through clearly.
Step 2: Add your light
- If you’re using a tealight, turn it on and place it directly inside the jar.
- If you’re using fairy lights, gently coil them inside. Hide the battery pack behind the jar or wrap it in dark fabric to blend it into the setup.
Step 3: Soften the glow with tulle (optional)
To create that dreamy, glowy effect, you have two options:
- If you’re confident using a cool-touch LED, you can loosely wrap the light in a small piece of tulle before placing it in the jar — this softens the light.
- Or, for an extra-safe alternative (especially for younger kids), wrap the tulle around the outside of the jar and tie it with ribbon or twine. You still get the soft vibe — with zero fabric inside.
Step 4: Add a label
Tape a printed or handwritten label to the jar, or tie one around the neck with string.
Simple ideas:
- Witch’s Light
- Glow Dust
- Potion No. 1
Step 5: Place it in your photo booth area
Set it on a stool, a shelf, or the floor near your backdrop. It adds a warm, ambient glow — especially in lower light.
Tips and Ideas
- If your LED light is cool white and you want a warmer look, switch to amber or soft white LEDs.
- No jar? A clear glass or plastic cup will do in a pinch.
- Making more than one? Vary the heights and colors to create your own mini potion shelf.
This is a low-effort way to help your daughter add her own touch of magic to the photo booth.
Let her choose the colors and label names — it’s a small detail, but it makes the glow feel like it’s hers.
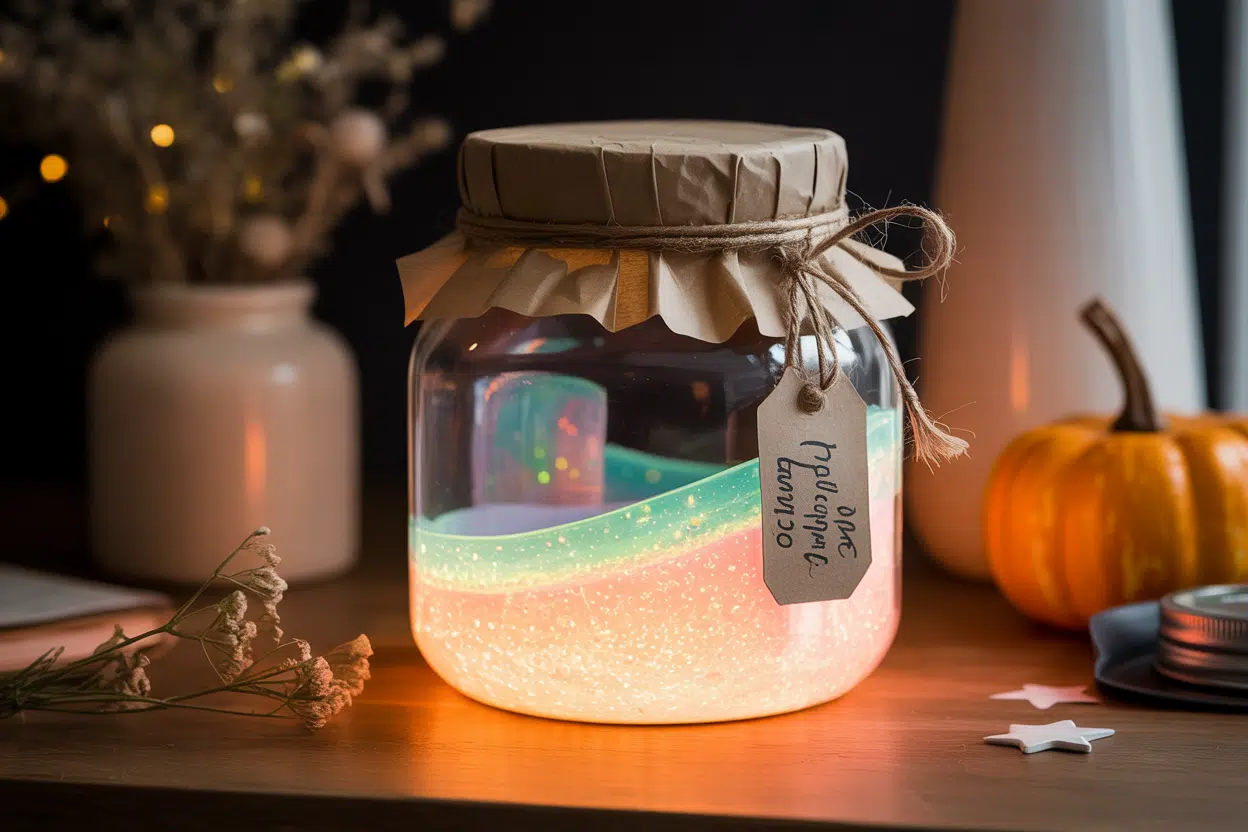
Glitter Swirl Potion Jar – One of the Easiest Simple Halloween Crafts
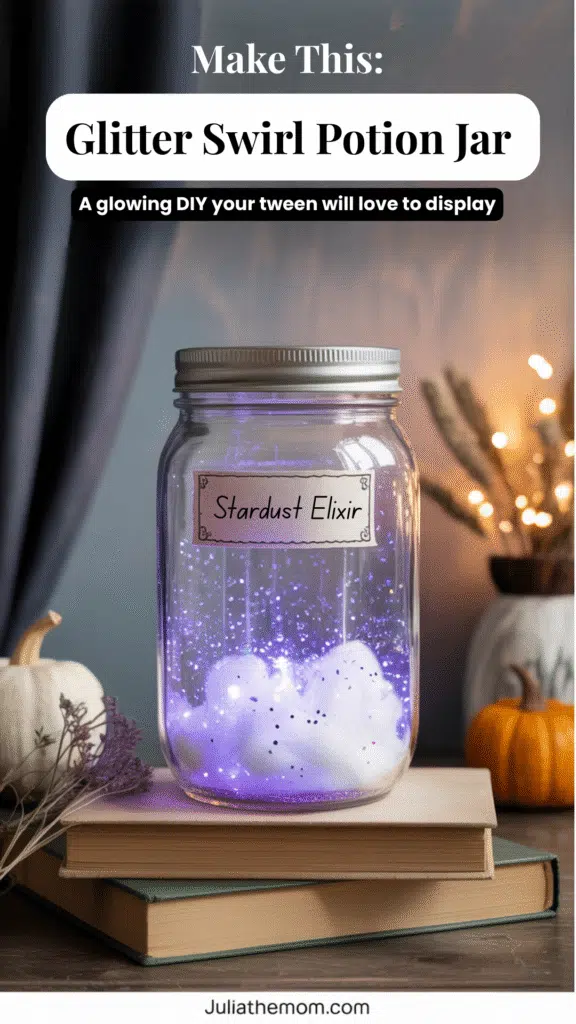
If your tween loves shimmer, movement, and a little extra magic, this jar is a hit. It’s like a calm jar meets witchy elixir — with all the sparkle and none of the spills (if you seal it right).
It’s a little more involved than the fairy light jar, but it still fits perfectly into the kind of simple Halloween crafts you can finish in one afternoon. Bonus: it doubles as a sensory jar or desk decoration long after Halloween is over.
Materials You’ll Need
- A clear glass or plastic jar with a tight-sealing lid
- Clean water (room temp)
- Clear school glue (about 2 tablespoons)
- Fine glitter (any color)
- 1 drop of food coloring (optional, for tint)
- A spoon or chopstick for stirring
- Optional: cotton ball or a pinch of fiberfill for a misty effect
- Optional: label or tag
💡 Safety reminder: This version uses water and glue — it’s not for shaking open or unsupervised toddler hands. Just seal the lid tightly, and keep it as a display prop.
How to Make It
Step 1: Fill your jar two-thirds full with water
Leave room at the top for stirring and any extras you want to add.
Step 2: Add about two tablespoons of clear glue
This helps slow the movement of the glitter so it swirls instead of sinking right away.
Step 3: Add a pinch of glitter
You can combine two colors or stick to one. A little goes a long way — too much and it’ll just clump.
Step 4: Optional — add 1 drop of food coloring
This gives your potion a subtle tint. Stick with one drop — it’s surprisingly strong.
Step 5: Optional — add a cotton ball or tiny piece of fiberfill
Drop it in last, and let it float. It adds a cloudy, foggy look that works great in photos.
Step 6: Stir gently with a spoon or chopstick
Watch the glitter swirl. If it clumps, add a little more water or stir a bit longer.
Step 7: Close the lid tightly
You can hot-glue or tape the lid shut if this will be used as a long-term prop or handled by kids.
Step 8: Add a label or tag
Write something fun like:
- Stardust Elixir
- Crystal Mist
- Potion No. 9
Tips and Ideas
- Want a stronger swirling effect? Add a few drops of baby oil or glycerin with the glue.
- Use iridescent or star-shaped glitter for extra drama.
- Don’t want to use glue? Just water and glitter will still work — the glitter will just settle faster.
This one’s all about the glow and movement.
It looks especially good under soft lighting or next to a glowing jar from version 1. And your tween will love how it feels like actual magic in a bottle — made by both of you.
Glow-in-the-Dark Goo Jar – A Fun Twist on Simple Halloween Crafts
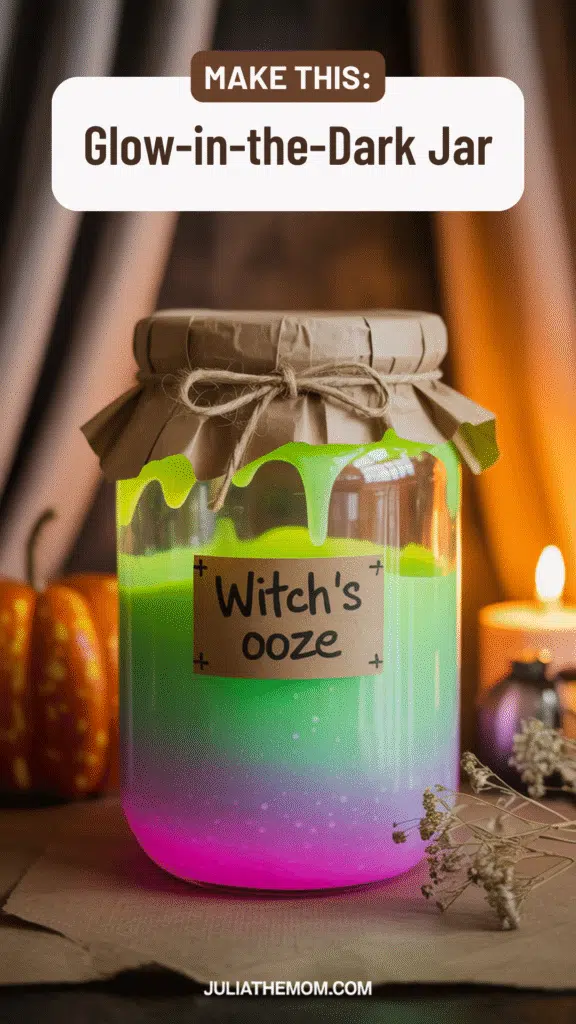
If your tween loves anything that glows or oozes, this one’s a win.
It brings in that witchy, gooey energy — without needing to make slime from scratch.
This version uses store-bought glow-in-the-dark slime, so it’s fast, safe, and zero guesswork. Perfect for adding texture and color to your Halloween photo booth setup.
Materials You’ll Need
- 1 small jar of glow-in-the-dark slime (around 100–120 ml, non-toxic and kid-safe — green, purple, or blue work best) This is enough for a jar up to 250 ml in size.
- 1 clear glass or plastic jar with lid (500 ml works well. For larger jars, you’ll need 2–3 slime jars.)
- Optional: A handwritten or printed label (e.g. Witch’s Ooze)
How to Make It
Step 1: Add the slime
Scoop your slime into the jar — but don’t fill it to the top.
Aim for about ½ full. That gives the slime space to stretch and “breathe.”
Step 2: Style the inside (two vibe options)
- Neat & clean: Smooth the slime and keep it flat. Looks tidy, like a potion on a witch’s shelf.
- Witchy & wild: Use a spoon or clean fingers to smear some slime up the inside walls of the jar. Let it stretch or drip slightly — it gives off a bubbling cauldron feel.
Want to mix colors?
You totally can — and it looks even more magical in photos.
Here’s how:
- Use 2 or 3 glow-in-the-dark slimes in different colors (green + purple, or green + pink work great)
- Layer them — one color first, then another gently on top
- For a more swirled effect, drag a stick or spoon once or twice through the slime (Don’t overmix — too much and the colors blend into one)
Let some of the colors streak along the jar walls for an extra oozy potion look.
Pro tip: darker slime on the bottom + brighter on top = glowy contrast that really pops in photos.
Step 3: Charge the glow
Let the jar sit under a lamp or sunlight for 5–10 minutes.
Turn off the lights — now it glows on its own. No lights or wires needed.
Step 4: Label it (optional)
A small tag or paper label gives it character.
Try names like Witch’s Ooze, Potion No. 13, or let your kid name it.
Tips to Keep It Safe + Fun
- Tape the lid if it’s just for display
- Keep slime away from fabrics or heat — this is for looks, not playtime
- Re-charge under bright light any time the glow fades
Let your daughter handle the slime part (trust me, she’ll be into it), while you work the photo setup.
One jar, five minutes, and boom — potion power.
Layered Witchy Sand Jar – A Creative Take on Simple Halloween Crafts
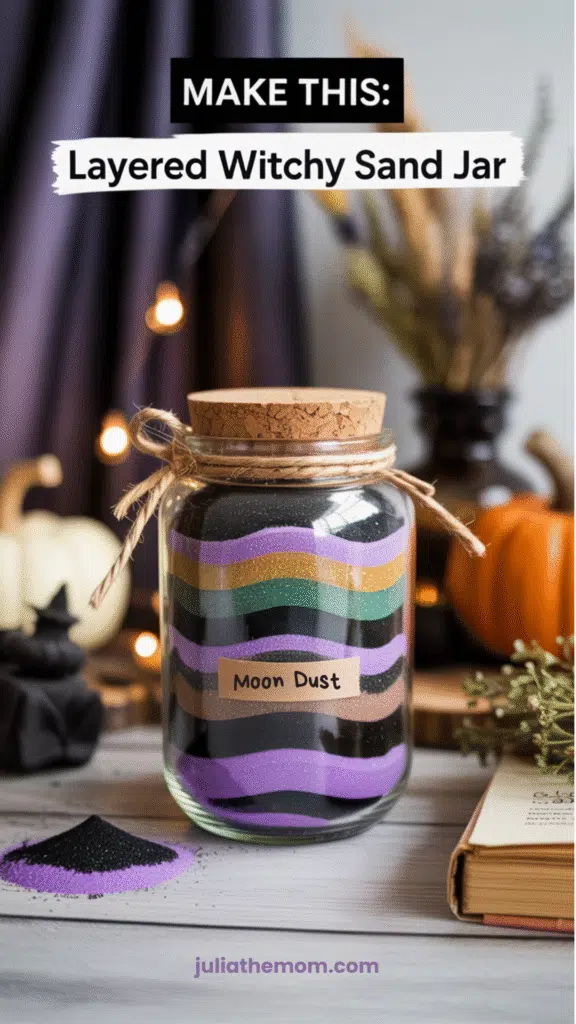
This one’s all about color and texture — and it’s surprisingly fun to make. Think of it like a witch’s layered spell in a jar, using colored craft sand instead of glitter or slime. No mess, no glow, just magical vibes and total creative freedom.
Great for kids who love crafting patterns or for moms who don’t want to deal with cleanup after glitter.
Materials You’ll Need
- 2 to 4 colors of craft sand (available in most art stores or online) Classic witchy picks: black, dark purple, dusty rose, silver, forest green, gold
- 1 small clear jar with lid (glass or plastic, 200–500 ml)
- A small funnel, spoon, or folded paper cone
- Optional: a stick or skewer for shaping the layers
- Optional: printable or handwritten label (e.g. Moon Dust, Sand of Shadows)
- Optional: cork lid, kraft paper, fabric scrap, twine
How to Make It
Step 1: Set up your colors
Open each sand packet and pour a bit into separate bowls or cups.
This makes layering way easier — and keeps things tidy.
Step 2: Start layering
Use a funnel or spoon to gently pour one color into the jar.
Tilt the jar slightly for slanted layers, or keep it flat for clean horizontal lines.
Fill about 1–2 cm per layer — more if you want bold stripes, less if you want a more blended look.
Step 3: Add more colors
Repeat with the next color.
Keep layering until the jar is almost full (leave a little space at the top if you’ll be sealing it with a lid).
Pro tip: Use a thin stick or skewer to poke down the sides and add curved or wavy shapes between layers. It’s a small touch, but it gives the jar that spellbound look.
Step 4: Decorate the top
If your jar has a cork lid, press it in gently and wrap twine around the neck for a rustic touch — a simple bow is enough.
No cork? Cover the opening with a square of kraft paper or dark fabric, tie twine around the neck, and let the edges stay a little crumpled — it adds texture.
Even a regular screw-on lid works. Just wrap the neck in twine and add a charm or mini tag if you like.
Step 5: Add a label
Stick on a label with a name your daughter likes — Moon Dust, Witch Sand, Dream Salt.
Handwritten is perfect here.
Tips for Success
- Want a soft shimmer? Mix in a bit of fine glitter with one or two sand colors.
- If your tween likes symmetry, let her plan the layer order before starting.
- These look beautiful grouped together in different sizes — try a set of 3.
This one’s calm, creative, and super display-friendly.
Even younger kids can help pour the sand — it’s a relaxing moment in the middle of Halloween hype.
Twinkle Confetti Elixir – Quick and Cheerful Simple Halloween Craft
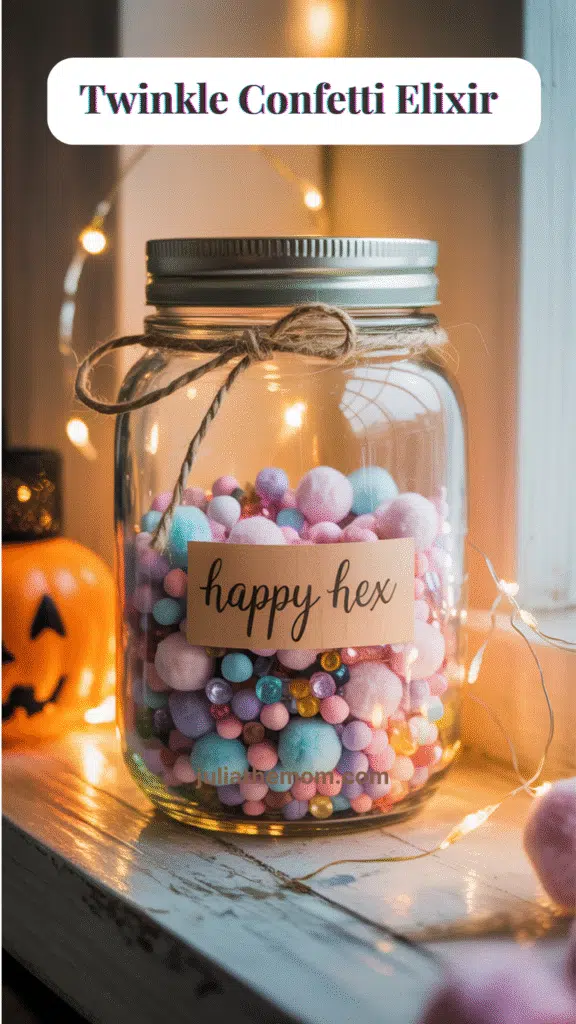
This one’s light, sparkly, and super easy to pull together. No liquids, no glue, no drying time — just color, shine, and a bit of styling. It looks magical with almost no effort.
Perfect if your tween loves cute things, shiny stuff, or has a stash of tiny craft supplies waiting to be used.
Materials You’ll Need
- 1 clear jar (glass or plastic, 200–500 ml)
- Confetti, mini pom-poms, plastic gemstones, sequins, or beads (Try metallics, pastels, holographic stars, or tiny moons)
- Fairy lights (battery-powered or a short strand)
- Optional: cork or paper lid, twine
- Optional: label — Happy Hex, Shimmer Shot, or anything fun
How to Make It
Step 1: Fill the jar
Choose a few types of sparkly or colorful fillers — different shapes and sizes look best mixed together.
Pour them into the jar until it’s about 3/4 full.
Layer, mix, or let it be random — all options work.
Let your daughter choose the mix. She’ll have strong opinions, and that’s part of the fun.
Step 2: Add some light
This jar isn’t lit from inside — it sparkles because of how you place it.
Try:
- Wrapping fairy lights gently around the jar
- Setting it near a soft light source (lamp, window, or your photo booth setup)
- Displaying it with other jars for a grouped shimmer effect
Even without lights, metallic or translucent fillers will catch natural light and shine.
Step 3: Style the top
Leave the jar open or add a lid — either works.
Wrap a bit of twine or ribbon around the neck for a finished touch.
Then add a label with a playful name like Happy Hex or Shimmer Shot.
Tips for Success
- Use a mix of shiny and soft textures for contrast — like sequins + pom-poms
- Don’t overfill: leave a bit of space at the top so it doesn’t look cramped
- Let your tween do the arranging — it’s quick, creative, and totally hers
- These jars look even better in groups — make two or three for different shelves or corners
Instead of Conclusion
These glowing jars are so beautifully simple, you don’t need to follow every step perfectly. Once you’ve tried one or two, feel free to mix, match, and make them your own. That’s the magic of simple Halloween crafts — they leave plenty of room for creativity (and a little chaos).
If your tween is into decorating, try turning a small corner of your home into a cozy Witchy Photo Booth. You don’t need much space — even a blank wall or shelf works. Add a few jars you’ve made together, some fairy lights, and you’re halfway there.
Want more ways to enjoy the season? Try 20 Fun Outdoor Halloween Party Games for Tweens.
Other Cozy Ideas to Try Together:
- 20 Fun Beach Day Family Activities for Preteens
- Mom and Daughter Bonding: 6 Fun Fortnite-Inspired Ideas
- or any other ideas from the Family Time Activities category.
Whatever you try, these simple Halloween crafts are a sweet way to connect, create, and make the season feel just a little more magical.
✨ Follow me on Pinterest @julia_the_mom for more easy ideas for moms, tweens, and cozy holidays.

